How to Speed up your MacBook?

Vintage MacBook was literally a piece of art in those days where many portable companies were trying Apple Inc was on the top and no one was even nearby back in 2012 the MD101 & MD102 with model # A1278 were one of the most sold devices which used to comes with Intel i5 Processor, 4GB RAM & 500GB of Hard Disk the battery backup of this device was awesome and no other brand can even come as the battery was built with lithium packs instead of cells which make the cost go up but it easily gives the backup of 5hours to 7hours. If you are still using those devices you can read this article about the upgrade before you take your device to any MacBook repair service center.
Slow Boot:
This is the main culprit why users opt for a hardware upgrade. Generally it takes about 1-2 mins to boot the Mac with a standard hard drive. The device is taking a long time to boot is because of the macOS. The latest software updates are very huge and need a higher rate of transfer speed which a hard drive is incapable of doing. Hence SSD upgrade + RAM upgrade is the best possible solution we can think of as of now. Below are our few recommendations and DIY information which you can try to make your old Mac run faster.
MacOS Update:
The macOS updates are quite common to be get notified and ask you if you want to install it or not. Understand with these heavy software updates you will need to get hardware upgrade too. Users generally do not do and hence the whole performance of the MacBook Pro is impacted. If you revert back to older version the Mac will run faster, it will not support any apps including google chrome, office suite, etc.
RAM memory upgrade:
These devices come with 4GB which is split into 2 sticks of 2GB + 2GB hence if you are planning for 8GB you will need to buy 4GB+4GB. When customers walk into our workshop for RAM upgrade, we always ask one question. What work they do on the device based on that we recommend the best options. Let’s say if you use your device for browsing and basic typing or office work, in that case, you don’t need to upgrade RAM try with only 4GB. If worked well you can stick with 4GB RAM, and no need to upgrade RAM. In case you are using the MacBook for Photoshop or video editing you can get 8GB or 16GB RAM. (16GB is the max memory supported on these Mac 8GB+8GB)
SSD upgrade:
The SSD (Solid State Drive) is a must you can swap it with the current hard drive. The SSD has a transfer rate of 600MB/S which is very high when you compare it with HDD which is 100MB/s. With the SSD upgrade the Mac can boot in less than 45 seconds. The SSD are expensive and choosing the right SSD is very much important. Once the SSD is installed you can install any macOS up to Big Sur but we recommended you stick with Catalina or High Sierra. The best configuration we think will be 8GB RAM & 250GB SSD of course you can choose to go for 500GB SSD make sure you back up all the data before processing with an update as data loss are very expensive and you will need to get in touch with hard disk data recovery in case the data is lost.
DIY MacBook SSD Upgrade:
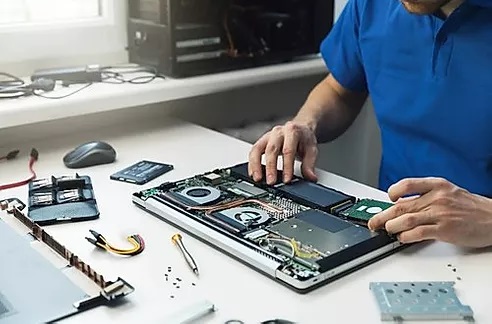
We suggest doing it only if you have the right tools and have basic knowledge of a MacBook, Here are the steps first turn off your MacBook —> On the back panel there are screw —> Open it—> Once the back panel is removed disconnect the battery now on the left side you will see a hard drive you can remove 2 screws and the hard drive will come out of its cabin. Now, this is very important you can remove the SATA cable which is connected to the hard drive. Make sure you remove it gently without using much pressure. Once the hard drive is out place the SSD inside, and connect the battery. Put all the screw and boot it in recovery mode by using the Command R key on the keyboard.


